The permit is approved. The charger is sitting in a box in your garage. Your electrician is coming tomorrow.
Most Houston homeowners have no idea what the next few hours actually look like. Will they need to move things? Will the power go off? How long will it take? What does the city inspection involve?
This post walks you through installation day from start to finish so you know exactly what to expect — and how to prepare your home so everything goes smoothly.
Before Installation Day: Three Things to Do
A little preparation the day before makes the job go faster and avoids unnecessary delays.
1. Clear the electrical panel. Your electrician needs unobstructed access to your breaker box. If it is in a utility closet, garage corner, or laundry area that tends to collect storage, move everything out. The electrician will be working at the panel repeatedly throughout the job — a clear path saves time.
2. Decide exactly where the charger will be mounted. This sounds simple but many homeowners leave it to the last minute and end up changing their mind mid-installation. Think through which wall, which side of the garage, and at what height. Consider your car’s charge port location when parked normally. Most charge ports are on the driver’s side front or rear corner — mount the charger on that side of the garage.
3. Have your charger’s installation manual ready. Even experienced Houston electricians appreciate having the manual on hand for specific mounting hardware requirements, torque specs, and any model-specific wiring notes.
For help deciding on the best mounting spot, read our post: Best Locations to Mount Your Home EV Charger in Houston
What Happens When Your Electrician Arrives
First 15–30 Minutes: Site Assessment
Your electrician will not go straight to work. They start by assessing the job conditions — even if they visited for a quote.
They will look at:
- Your electrical panel: available breaker slots, existing load, wire condition
- The planned conduit route from the panel to the mounting location
- Wall material and any obstacles (insulation, existing wiring, structural elements)
- The exact mounting location you have chosen
This is your chance to ask any final questions. Confirm the mounting height, the outlet type (NEMA 14-50 vs hardwired), and the cable routing path before they start drilling.
The Electrical Panel Work
Your electrician will turn off the main breaker before working inside the panel. Expect your power to go out for 20–45 minutes during this phase.
What they are doing:
- Installing a new double-pole breaker sized for your charger (40-amp for 32-amp charger, 60-amp for 48-amp charger)
- Running wire from the breaker to the start of the conduit run
- Verifying proper grounding
If your panel is older or has limited capacity, this is when they will flag any issues. A good Houston electrician will stop and discuss options with you rather than proceed with a workaround.
For homes where the panel may need upgrading before installation can proceed, see our post: Home Electrical Panel Upgrades for EV Charger Installation Houston
Conduit and Wire Run
This is typically the most time-consuming part of the job, especially in Houston homes with finished garages or longer runs.
The electrician runs conduit (protective tubing for the wire) from the panel to your charger mounting location. In an unfinished garage, this is usually surface-mounted conduit along the wall — fast and clean. In a finished garage with drywall, they may need to fish wire through the wall cavity, which takes longer.
Factors that affect conduit run time:
- Distance from panel to mounting location (10 ft vs 40 ft is a big difference)
- Whether walls are finished or unfinished
- Corners and obstacles along the route
- Whether the run goes through the garage ceiling into an attic
A typical attached garage installation in Houston with a 15–25 foot run takes 1–2 hours for the conduit and wiring phase.
Charger Mounting and Connection
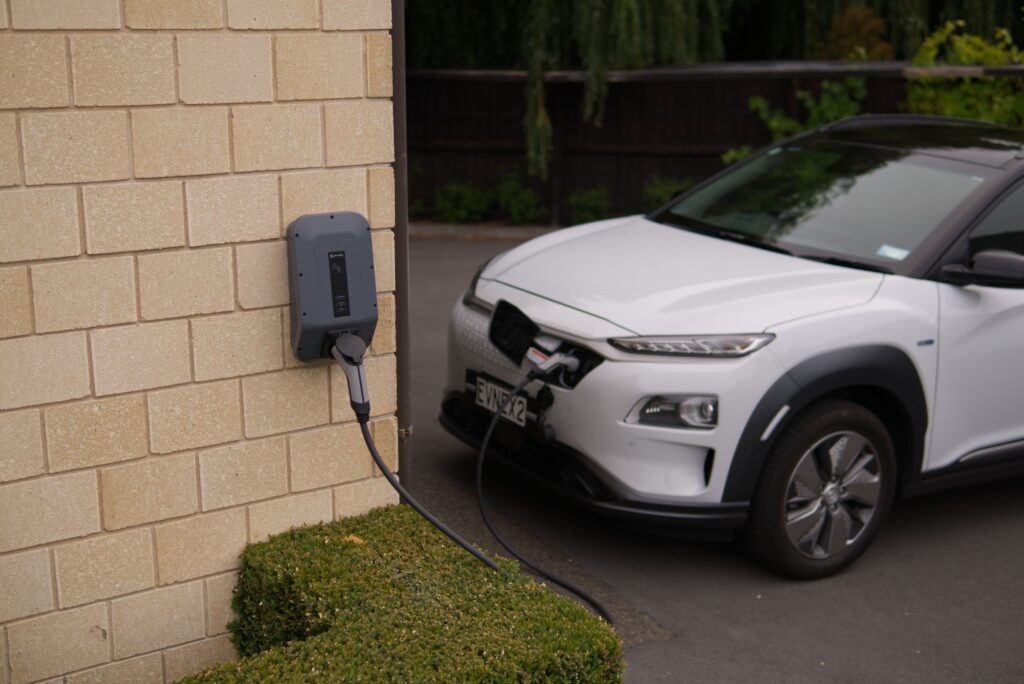
Once the conduit is run and wire is pulled, the electrician mounts the charger on the wall and makes the final connections.
For hardwired chargers: they connect the wires directly to the charger’s terminal block inside the unit.
For NEMA 14-50 plug-in chargers: they mount the outlet box, connect the wiring, and verify the outlet is wired correctly before you plug in the charger.
They will then restore power to the panel and test the charger — verifying it powers on, communicates with your vehicle, and begins charging as expected.
Expect the full installation to take:
- Simple install (short run, no obstacles): 2–3 hours
- Average install (standard attached garage): 3–4 hours
- Complex install (long run, finished walls, or detached garage): 4–6 hours
For a detailed breakdown of how the full project timeline looks from permit to final inspection, see our post: How Long Does EV Charger Installation Take in Houston?
What the Electrician Leaves Behind
Before they pack up, your electrician should:
- Clean up all debris and conduit scraps
- Leave the panel clearly labeled with the new EV charger breaker
- Provide you with the permit number and inspection scheduling information
- Walk you through basic charger operation if this is your first Level 2 unit
Ask for the permit number before they leave. You will need it if the city contacts you about scheduling the inspection, and it is your documentation that the work was permitted.
The City of Houston Inspection
Installation day is not the final step. The City of Houston requires an inspection of all permitted electrical work.
How it works:
- Your electrician typically schedules the inspection through the iPermits system
- A city electrical inspector visits your home — usually within 3–7 business days after the installation
- The inspector checks the breaker, conduit, connections, and charger mounting against NEC Article 625 requirements
- If everything passes (it almost always does with a licensed electrician), you receive a certificate of inspection
What you need to do:
- Be home for the inspection, or have someone 18+ there
- Have the panel and charger accessible — do not park your car in front of the charger
- The inspector may ask to see the charger in operation
If something fails inspection: This is rare with licensed work. Your electrician is responsible for correcting any deficiencies and scheduling a re-inspection at no additional cost to you.
For the full Houston permit process including iPermits submission and fee details, see: EV Charger Permit Houston — Complete 2026 Guide
After Installation: First Charge Checklist
Once your charger passes inspection, you are ready to go. Here is what to do on your first charge:
- Download the charger’s app and connect it to your home Wi-Fi
- Set a departure time or overnight charging schedule
- Plug in your vehicle and confirm the charger initiates a session
- Check your retail electric provider for time-of-use rate plans
- Take note of your charger’s serial number and save the installation paperwork
Your Complete Guide to EV Charger Installation in Houston covers ongoing charger maintenance, CenterPoint rate optimization, and everything else you need to get the most out of your new setup.
Related Posts
- Complete Guide to EV Charger Installation in Houston
- How to Choose the Right Level 2 Charger for Your Houston Home
- How Long Does EV Charger Installation Take in Houston?
- Best Locations to Mount Your Home EV Charger in Houston
- Home Electrical Panel Upgrades for EV Charger Installation Houston
- EV Charger Permit Houston — Complete 2026 Guide